The Essential Art of Egg Separation for Bakers
In the world of baking, few tasks are as seemingly simple yet critically important as knowing how to separate egg whites and yolks. Whether you're whipping up a cloud-like meringue, crafting delicate French macarons, or creating a rich custard, the purity of your egg whites can make or break your final product. The presence of even the tiniest speck of fat from the yolk can be a formidable adversary, sabotaging the egg white’s ability to aerate and achieve those coveted stiff peaks. This comprehensive guide will walk you through the easiest and most effective methods for flawless egg separation, ensuring your culinary creations reach their full potential. We'll explore classic techniques, offer valuable tips from seasoned bakers, and delve into the science behind why this seemingly minor step holds such immense power in the kitchen.Why Precise Egg Separation Matters for Bakers
Before diving into the "how," let’s understand the "why." Egg whites are primarily protein and water. When whipped, these proteins denature and create a stable foam by trapping air. This foam is the structural backbone of many ethereal desserts, providing lift and a delicate texture. Egg yolks, however, contain a significant amount of fat. Fat is the enemy of foam formation. Even a microscopic amount of yolk can coat the protein molecules in the whites, preventing them from unraveling and intertwining to trap air effectively. The result? Flat meringues, dense soufflés, and macarons that fail to develop their characteristic "feet." For recipes like delicate meringues and finicky French macarons, meticulous separation is non-negotiable. If you want to master these confections, understanding the nuances of separating eggs is your first crucial step. To dive deeper into the science and impact of proper separation, you might find our article on Why Proper Egg Separation is Key for Perfect Meringues & Macarons particularly enlightening.Mastering the Classic Shell-to-Shell Method
Often considered the most traditional and reliable method, the shell-to-shell technique leverages the egg's natural structure to separate whites from yolks. It requires a gentle touch and a bit of practice but yields excellent results.The Setup: Bowls and Prep
Always start with at least two bowls. A small bowl for separating each egg individually and a larger bowl to collect the separated whites (and another for yolks). This "one-by-one" approach is a golden rule for bakers:
- The Safety Bowl: Separate each egg into a small, clean bowl first. This way, if a yolk breaks or you get a piece of shell, only that single egg is compromised, saving your batch of already separated whites.
- The Collection Bowls: Once an egg is successfully separated, transfer the white to your main collection bowl and the yolk to another.
Before you even touch an egg, ensure your hands and all equipment are impeccably clean and free of grease or oil residue. Even natural body oils can affect egg whites.
The Crack: Precision is Key
Gently crack the egg on a flat surface rather than on the rim of a bowl. Cracking on a flat surface minimizes the risk of eggshell shards falling into your egg, making for a cleaner break. Aim for the middle of the egg, creating a clean, even crack.
The Transfer: Gently Does It
- Pry Apart: Holding the cracked egg over your small separation bowl, use your thumbs to gently pry the two shell halves apart.
- Let Whites Drip: Allow the egg white to stream out of the lower shell half into the bowl below, while the yolk remains nestled in one half.
- Rock and Roll: Carefully transfer the yolk back and forth between the two shell halves. Each transfer allows more of the clinging egg white to drip away. Be exceedingly careful not to pierce the yolk membrane.
- Final Placement: Once the white is mostly separated, place the intact yolk into its designated bowl and transfer the clean white to your main collection bowl.
Expert Tip: Egg Temperature
While many recipes call for room temperature egg whites for optimal whipping, eggs are actually easier to separate when chilled. The yolk membrane is firmer and less likely to break when cold. So, you have two options:
- Separate Cold, Warm Later: Separate your eggs straight from the fridge (when the yolks are firmest), then cover the whites and let them come to room temperature (usually 30-60 minutes) before using. This is often the safest bet for delicate recipes.
- Separate Warm, Be Careful: If your recipe absolutely demands room temperature eggs from the start, allow them to warm up first, but proceed with extreme caution during separation as the yolks will be more fragile.
The Quick and Tactile Hand Method
For those who prefer a more direct approach and aren't afraid to get their hands a little messy, the hand method is remarkably fast and efficient.Cleanliness First
This method involves direct contact between your hands and the egg whites, making meticulous handwashing paramount. Wash your hands thoroughly with soap and hot water to remove any oils, lotions, or contaminants before you begin. Remember, even tiny traces of oil can hinder your whites from whipping properly.
The Technique: Letting Gravity Do the Work
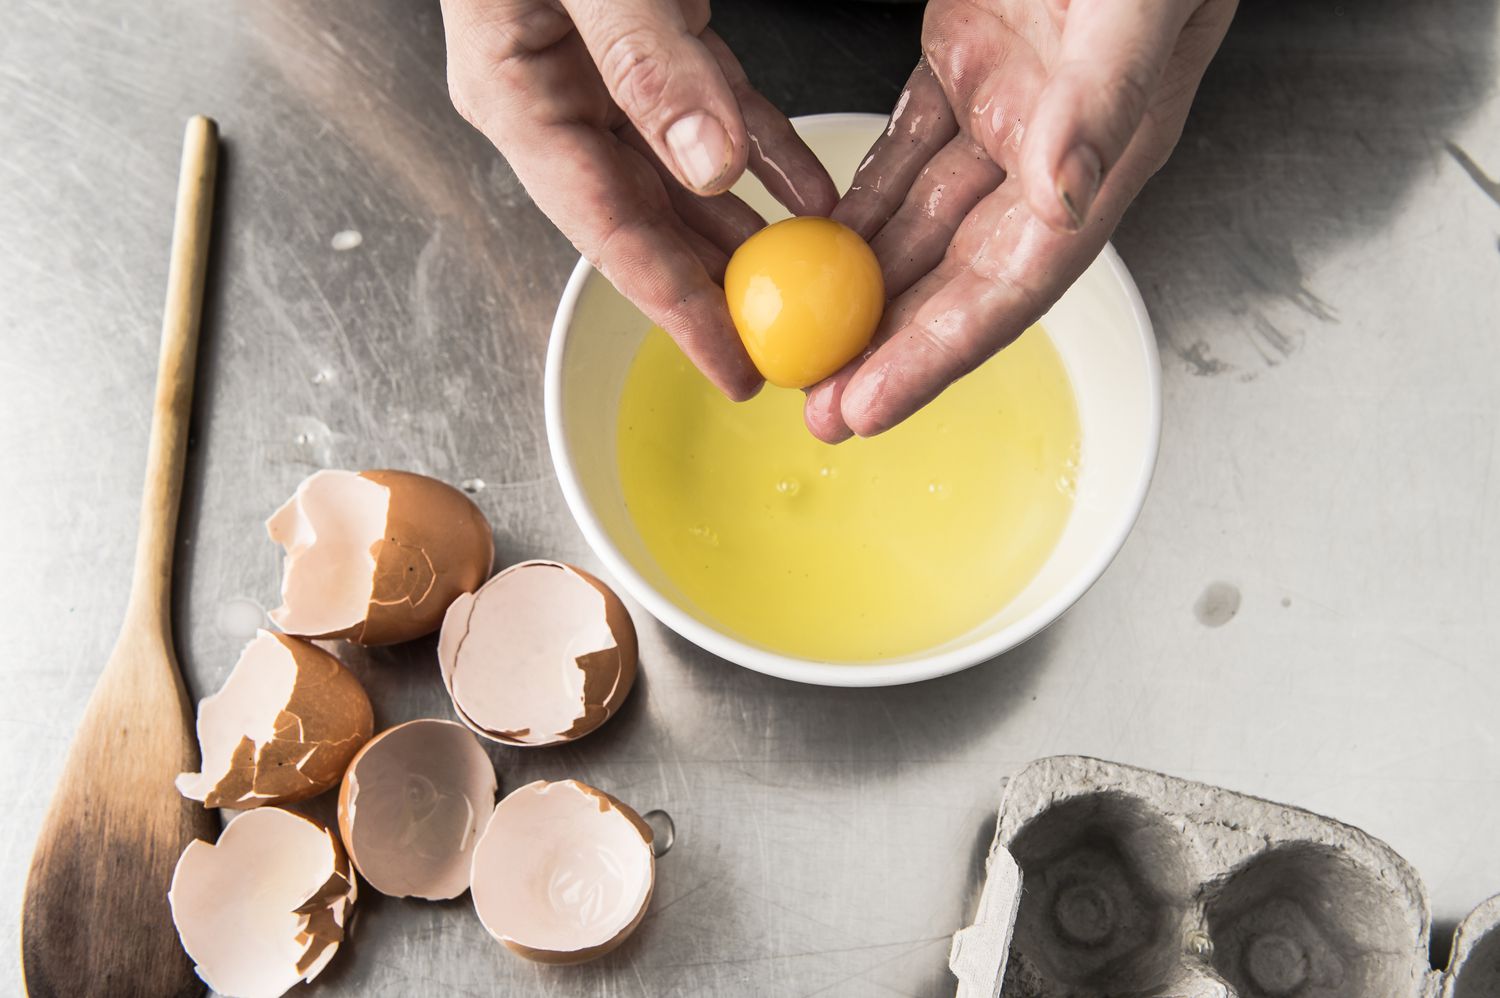
- Crack Over Palm: Crack the egg onto a flat surface as before, then gently open it over your upturned, cupped palm.
- Finger Filtration: Allow the egg white to gently slide through your fingers and into a bowl positioned underneath your hand.
- Yolk Retention: The intact yolk will remain in the cup of your palm.
- Separate and Collect: Once the white has fully dripped, transfer the yolk to its bowl and the white to the collection bowl.
Considerations for Whipped Whites
While incredibly fast, some professional bakers caution against excessive hand contact if the whites are destined for a delicate meringue or foam. The natural oils on our skin, even after washing, can subtly affect the whipping potential. However, for most home baking scenarios, as long as hands are thoroughly washed, this method is perfectly acceptable and widely used.
Smart Strategies for Flawless Separation Every Time
Beyond the core methods, a few additional tips can significantly improve your success rate in separating eggs.Dealing with Erratic Shell Bits
Despite your best efforts, sometimes a tiny piece of eggshell will inevitably fall into your whites. Don't panic! The easiest way to remove it is not with your finger (which could introduce oils), but with a larger piece of eggshell. The larger piece of shell acts like a magnet, attracting and scooping up the smaller, rogue fragment with surprising ease.
The Power of the Single Egg Test Bowl
We've mentioned it, but it bears repeating: always separate eggs one by one into a small, separate bowl before adding the whites to your main collection bowl. This simple habit is the ultimate insurance policy against a broken yolk contaminating an entire batch of whites. It’s a baker's best friend, especially when dealing with a recipe that calls for many egg whites.
Exploring Other Separation Techniques
While the shell-to-shell and hand methods are popular and effective, the culinary world offers other gadgets and clever hacks.- The Squeeze Bottle Method: A fun and surprisingly effective trick! Crack your eggs into a wide, flat bowl. Take a clean plastic squeeze bottle (like a condiment bottle), gently squeeze out some air, then place the opening over a yolk. Release the squeeze, and the suction will draw the yolk cleanly into the bottle, leaving the whites behind.
- Egg Separator Gadgets: Various tools are designed specifically for egg separation, often featuring a cradle for the yolk and slits for the white to drain through. While convenient, they add another item to wash and can sometimes leave more white clinging to the yolk than manual methods.
Each method has its proponents, and often, the "best" way is simply the one you find most comfortable and reliable. For a deeper dive into these and other techniques, including specialized tools, check out our comprehensive guide: Separate Eggs Like a Pro: Shell, Hand & Tool Methods Explained.
